Showing posts with label Crochet. Show all posts

Tuesday, December 6

Finally, It Makes Sense

Ever since I first discovered it, some five years ago, I've thought the Tunisian crochet stitch was pretty cool. Both of my long-time readers may remember this Tunisian stitch satchel I made for my niece, lo these many moons ago.

More recently, I found instructions for the Tunisian Knit stitch in a stitch dictionary I'd gotten. The resulting fabric is such a neat knit-like look, without all the trouble of actually having to knit. The only problem was, the instructions provided in that particular book were not very clear. I tried and tried and tried, but just couldn't figure out quite where to place my hook to get the neat chained-stitch effect.

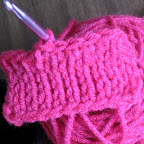
Tunisian Knit StitchThis week's Crochet Me newsletter features a tutorial on the Tunisian stitch, including a diagram of Tunisian Knit showing exactly where the hook goes. I tried it out and, whaddaya know, it worked exactly like it's supposed to!

I can totally see this as a cuff to a sweater or a mitten. Maybe I'll start a pair of mittens for myself, now that the winter weather has actually arrived in Sioux Falls with a half inch of snow dusting the ground. Or maybe I should complete some of the UFOs cluttering up the top of my piano first ...

Sunday, September 4

Ten Hundred Million Years

Rosi has a typically childish notion of time. That is to say, she really has no concept of how long an hour, a day, or a year is. When something hasn't happened soon enough to please her (generally the instant she suggests it), she'll complain that it's been hours or days or even "ten hundred million years" since she first asked and she can't possibly wait any longer.

After she made such a comment the other day in the car, I explained to Adam my theory as to why time moves so much faster for Rosi than for the rest of us: in her universe, everything revolves around her. Since she's so much smaller than the sun, it all goes by that much quicker.

Meanwhile, it's been positively forever since my last post. We've been doing our best to keep ourselves occupied here, so let me give you a bulleted list of what we're up to these days.
  • I've been spending a lot of time cooking, thinking about cooking, reading about cooking, writing about cooking (I have 60+ recipes posted over at Low-Carb Real Food), and trying to take half-decent pictures of my food. And when I'm done with all that, I spend a few minutes eating and then the kitchen has to be cleaned up all over again. Cooking three meals a day at home makes for a lot of dishes!
  • Ever since I made the doll for my contest winner a couple of years ago, I've been wanting to make another and work out my own pattern. I even went so far as to buy yarn for the project a few months back. Then I got caught up doing other things, and I've only gotten back to it the last week or so. As best I can figure, I'm about halfway done. I've also run out of stuffing, so I need to make a run to the store before I can finish any further. Originally, this doll was meant to be for Rosi, but she'd been begging for another doll who would close its eyes when lying down. We found one for 25¢ at a garage sale over the summer and it's been well loved by both the kids. Since Rosi has a new-to-her doll, I decided that once I finish this one, it will be for Ian. I'm shooting to make it a birthday gift, which means I have about 2½ months to complete the doll and make it some clothes.
  • I've been homeschooling Rosi to a greater or lesser degree for about two years now. We've tried a few different educational philosophies, but the one we keep returning to is unschooling, or interest-led learning. I really felt like I was trying too hard last year, pushing her when she didn't need any pushing. This year, I decided we really needed some support and community in the homeschooling arena. A couple of weeks ago, we joined a local homeschool group. we've gotten together with them for a couple of activities already and it's been a lot of fun. I'm really excited about what's coming up in the next several months. Rosi is too. It's been difficult for her to maintain friendships when she doesn't see kids at school everyday. A few of our neighbors have kids, but most of them are younger. The one friend her own age that she'd made in our building moved out several months ago. We also haven't had a regular church we've been attending, so that hasn't been a viable avenue for ongoing friendships either.
  • And speaking of churches, we actually visited one this morning that we'd all like to go to again. The people were welcoming, the message was solid and timely, the music was good, and I was really happy with the way they handled communion. I've been less than impressed with the way children are so often overlooked when it comes to communion. I understand that families and denominations have differing beliefs about who can take communion. But, in practice, I am very uncomfortable with the way my kids have been treated when we've visited some churches and have brought them up for communion. It is very rare to find a communion "policy" noted in the bulletin or announced during the service. At the church we worshiped in this week, however, the pastor invited the congregation to participate and noted that each family should determine whether their children should receive the bread and wine. One of the things I loved most about our church in Illinois was the recognition that we all don't agree on a lot of theological points--and that's okay. The Church is big enough for people to hold different ideas about baptism or communion or speaking in tongues. Those issues are not actually central to the Gospel and they shouldn't be treated as if they were. I'm excited to find someplace that makes a point of that right in the service.
  • Ian is having his own version of interest-led learning. You might call it "toilet unschooling." For the past month or so, he's been pretty frequently asking to use the toilet. He's also gotten really remarkable in the way he can undress himself and take a diaper off, even when he's snapped into a bodysuit. So, I've mostly given up on trying to keep him dressed. I insist that he wear a diaper when we're out or while he's sleeping, but most of the time he spends the majority of his day running around the house without any clothes on. He uses the toilet more than not, and for those times when he doesn't quite make it, I keep a spray bottle of cleaner and a roll of paper towels handy. As an added bonus, I figure he's probably saved us about $15 in diapers so far.
Well, that's not everything we've been up to, but that's probably enough for one post. I will try to start updating with a little more frequency again. Maybe I can manage to post more like once a week rather than once a month. For now, I'm going to go catch up on some sleep!

Friday, July 22

To Market, To Market

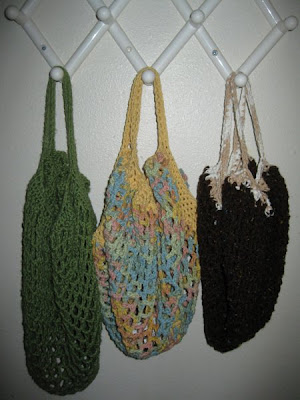
I've been trying to crocheting market bags for years. A couple of years ago I found a pattern that constructs the bag as a flat mesh rectangle, then gathers the edges and adds handles. As usual, I couldn't stick to a pattern, so I created my own.

Market Bags

Materials Used
  • 5¼ oz/265 yds worsted weight cotton
       • 4 oz/200 yds for mesh and
       • 1¼ oz/65 yds for handles
  • I crochet hook (5.5 mm)
  • stitch marker
Gauge

6 sc and 8 rows = 2”
Gauge is not crucial to this pattern.

Finished Size

Approx 18" from top of handles to bottom of bag, empty and unused. Bag will stretch with use (the green bag in the above photo is older and has been used much more often).

Special Stitches
  1. Single crochet two together (sc2tog) **Slip hook into next stitch, yo, and draw loop onto hook. Repeat from **, yo and draw through all 3 loops on hook. Counts as 1 sc.
  2. Foundation single crochet (fsc) Click here to view Alice's fantastic Futuregirl tutorial.
Notes
  1. Mesh is worked in rows, turning work at the end of each row. Handles are worked in a spiral around the edge of the mesh square.
  2. Double crochets (dc) in Row 1 are worked over (around) the whole foundation chain rather than into indicated stitches. This allows the finished bag to stretch more evenly.
Mesh

Ch 95.
Row 1 Dc over 6th ch from hook. **Ch 2, skip 2 ch, dc over next ch. Rep from ** to end of ch. Secure last st to 1st ch with stitch marker. (30 dc)
Rows 2-30 Ch 4. **Dc in ch-2 space, ch 2. Rep from ** to end of row. (30 dc)
Bind off.

Handles

Remove stitch marker from Row 1 and pull up a loop through both the 1st ch and the bottom of the last dc in Row 1.
Round 1 Work 2 sc in corner space and each of the 28 ch-2 spaces along foundation ch. **Work 4 sc in corner, rotate work 90° and 2 sc in each space along next edge. Rep from ** to last corner space. Work 2 more sc in 1st corner space, for a total of 4 sc in that space. (240 sc)
Round 2 Sc2tog around (120 sc)
Round 3 **Sc2tog across 1st 30 sc. Sc in each of next 30 sc. Rep from ** (90 sc)
Round 4 Sc in each sc around (90 sc)
Round 5 **Fsc 30, skip 15 sc, sc in each of next 30 sc. Rep from ** (120 sc)
Rounds 6-7 Sc in ea sc. (120 sc)
Bind off and weave in ends.

Sunday, April 24

Somebunny to Love

Just (barely) in time for Easter, a cute bunny buddy to make for a little one in your life.

Materials Used

  • 1 oz worsted weight cotton in bunny color (color A)
  • 2.5 oz worsted weight cotton in afghan color (color B)
  • small amount of stuffing material, less than 1 oz polyester filling
  • F crochet hook (3.75 mm)
  • G crochet hook (4.25 mm)
Optional
  • size 1 steel crochet hook (2.75 mm)
  • 60 yards size 10 cotton thread
  • small amount of yarn or embroidery floss for facial features
  • yarn or thread needle
Gauge

With F hook, 9 sc and 9 rows = 2”
Gauge is not crucial to this pattern, but checking your gauge will allow you to estimate the size of your completed project.

Finished Size

12" from top of ears to bottom corner of afghan

Special Stitches

Decrease (decr) [Slip hook under FRONT LOOP ONLY of next stitch, yo, and draw loop onto hook] twice, yo and draw through all 3 loops on hook. Counts as 1 sc.
Topstitch (tst) Starting with a loop on the hook and holding yarn on RIGHT SIDE of fabric only, slip hook through stitch, yo, and draw loop onto hook, yo and draw through both loops on hook. Begin second stitch by slipping hook into the opening from which the working yarn extends.

Notes
  1. For bunny ears and head, rounds are worked in a continuous spiral; do not join at the end of any round. Afghan rounds are joined with slst, which are also used to advance working yarn to the starting point for the next round.
  2. Pattern is written to attach ears and afghan during stitching rather than after all items are complete. Each part can be crocheted separately and joined as usual by following alternate instructions in Round 11 of head and Foundation Round of Afghan.
  3. The basic afghan directions include a simple sc border. A variation for the more delicate lace border can be found at the end of the pattern.
Ears

Make 2.
Round 1 In A with F hook, work 4 sc into an adjustable ring and pull end of yarn to tighten. (4 sc)
Round 2 2 sc in each sc around. (8 sc)
Round 3 [2 sc in first sc, sc in next sc] around. (12 sc)
Round 4 [Sc in first sc, 2 sc in next sc, sc in next sc] around. (16 sc)
Rounds 5-8 Sc in ea sc around. (16 sc)
Round 9 Decr, sc in ea sc around. (15 sc)
Round 10 Decr, sc in ea sc around. (14 sc)
Round 11 Decr, sc in ea sc around. (13 sc)
Round 12 Decr, sc in ea sc around. (12 sc)
Round 13 Decr, sc in ea sc around. (11 sc)
Round 14 Decr, sc in ea sc around. (10 sc)
Round 15 Sc in ea sc around. (10 sc)
Round 16 Repeat Round 15.
Tie off and flatten ear, folding along line of decr.

Head

Head is worked from the nose to the back of the head.
Round 1 In A with F hook, work 6 sc into an adjustable ring and pull end of yarn to tighten. (6 sc)
Round 2 2 sc in each sc around. (12 sc)
Round 3 [Sc in first sc, 2 sc in next sc, sc in next sc] around. (16 sc)
Round 4 [2 sc in first sc, sc in ea of next 3 sc] around. (20 sc)
Rounds 5 [Sc in ea of first 2 sc, 2 sc in next sc, sc in ea of next 2 sc] (24 sc)
Round 6 [2 sc in first sc, sc in ea of next 5 sc] around. (28 sc)
Round 7 [Sc in ea of first 3 sc, 2 sc in next sc, sc in ea of next 3 sc] (32 sc)
Round 8 [2 sc in first sc, sc in ea of next 7 sc] around. (36 sc)
Rounds 9-10 Sc in ea sc around. (36 sc)
Round 11 Attach ears: Sc in ea of first 12 sc. Align one flattened ear in front of the next 5 sc, keeping the decr edge to the RIGHT and the tip of the ear down. Start to attach right ear by slipping hook through first front and back sc on the ear, then through the next sc in Round 10; draw a loop through all three stitches and complete sc as usual. Repeat for next 4 sc to completely attach right ear. Sc in ea of next 2 sc. Align left ear in front of the next 5 sc, keeping the decr edge to the LEFT and the tip of the ear down. Attach left ear in the same manner as right ear over the next 5 sc. Sc in ea remaining 12 sc around. (36 sc)
Alternately, repeat Round 10 and attach ears with yarn needle after stuffing head.
Round 12 Sc in ea sc around. (36 sc)
Round 13 [Sc in ea of first 2 sc, decr, sc in ea of next 2 sc] around. (30 sc)
Round 14 [Decr, sc in ea of next 3 sc] around. (24 sc)
Round 15 [Sc in first sc, decr, sc in next sc] around. (18 sc)
Round 16 [Decr, sc in next sc] around. (12 sc)
Tie off, leaving a 12" tail for sewing. Weave in ends left inside the head. Stuff and gather final stitches on remaining tail with yarn needle. Pull tight, tie off, and weave in end. If desired, sew on facial features using yarn or embroidery floss.

Afghan

I found this pattern a bit complicated to describe, but it's a simple granny-square design, worked into a triangle.
Foundation Round Starting at the back, in B with G hook, work 18 tst in a ring around the bottom of the head, where the bunny's neck would be. Join to first tst with a slst. (18 tst)
Alternately, ch 10 and join into a ring with slst. Work Round 1 into ring and attach to head after completing afghan.
Round 1 Ch 1. Sc in first tst, ch 1 (count as first hdc). Hdc in ea next 2 tst, ch 3, hdc in ea next 3 tst. [Ch 2, hdc in ea next 3 tst, ch 3, Hdc in ea next 3 tst] twice. Ch 2 and join to first hdc with slst. Slst in ea of next 2 hdc. (6 3-hdc fans)
Round 2 Sc in ch-3 space, ch 1 (count as first hdc). 2 hdc, ch 3, 3 hdc in same ch-3 space. Ch 2, skip next 3 hdc, 3 hdc in ch-2 space (fan made). Ch 2, skip next 3 hdc, {fan, ch 3, fan} in ch-3 space (corner made). Ch 2, fan in ch-2 space. Ch 2, corner in ch-3 space. Ch 2, fan in ch-2 space. Ch 2 and join to first hdc with slst. Slst in ea of next 2 hdc. (9 fans)
Round 3 **Corner in corner, ch 2, [fan in ch-2 space, ch 2] twice. Repeat from ** around. Join to first hdc with slst. Slst in ea of next 2 hdc. (12 fans)
Round 4 **Corner in corner, ch 2, [fan in ch-2 space, ch 2] 3x. Repeat from ** around. Join to first hdc with slst. Slst in ea of next 2 hdc. (15 fans)
Round 5 **Corner in corner, ch 2, [fan in ch-2 space, ch 2] 4x. Repeat from ** around. Join to first hdc with slst. Slst in ea of next 2 hdc. (18 fans)
Round 6 **Corner in corner, ch 2, [fan in ch-2 space, ch 2] 5x. Repeat from ** around. Join to first hdc with slst. Slst in ea of next 2 hdc. (21 fans)
Round 7 **Corner in corner, ch 2, [fan in ch-2 space, ch 2] 6x. Repeat from ** around. Join to first hdc with slst. Slst in ea of next 2 hdc. (24 fans)
Round 8 **Corner in corner, ch 2, [fan in ch-2 space, ch 2] 7x. Repeat from ** around. Join to first hdc with slst. Slst in ea of next 2 hdc. (27 fans)
Round 9 **Corner in corner, ch 2, [fan in ch-2 space, ch 2] 8x. Repeat from ** around. Join to first hdc with slst. Slst in ea of next 2 hdc. (30 fans)
Round 10 **Corner in corner, ch 2, [fan in ch-2 space, ch 2] 9x. Repeat from ** around. Join to first hdc with slst. Slst in ea of next 2 hdc. (33 fans)
Round 11 **Corner in corner, ch 2, [fan in ch-2 space, ch 2] 10x. Repeat from ** around. Join to first hdc with slst. Slst in ea of next 2 hdc. (36 fans)
Round 12 **Corner in corner, ch 2, [fan in ch-2 space, ch 2] 11x. Repeat from ** around. Join to first hdc with slst. (39 fans)
For a more delicate edging, tie off yarn here and follow lace variation directions below.
Round 13 Ch 1. Sc in ea of first 3 hdc, 5 sc in ch-3 space, [sc in ea of next 3 hdc, 2 sc in ch-2 space] 12x. **Sc in each of next 3 hdc, 5 sc in ch-3 space, [sc in ea of next 3 hdc, 2 sc in ch-2 space] 12x. Repeat from ** around. Join to first sc with slst. (204 sc)
Round 14 Ch 1. Sc in ea of first 5 sc. [3 sc in next sc, sc in ea of next 67 sc] repeat. 3 sc in next sc, sc around. Join to first sc with slst. (210 sc)
Tie off and weave in ends.

Lace Edging Variation

Follow basic afghan instructions through Round 12.
Round 13 In cotton thread with size 1 steel hook, make 2 sc in ea st (hdc or ch) around. Join to first sc with slst. (396 sc)
Round 14 Ch 1, sc in first sc, ch1 (count as 1 hdc). Hdc in next sc, ch 1. [Skip next sc, hdc in ea of next 2 sc, ch 1] around. Join to first hdc with slst. (396 st)
Round 15 Skip first hdc, sc BETWEEN first 2 hdc, skip second hdc, 3 hdc in ch-1 space. [Skip next hdc, sc between 2 hdc, skip next hdc, 3 hdc in ch-1 space] around. (528 st)
Tie off and weave in ends.

Monday, August 31

Buttons

I finally found my stash of buttons. Unfortunately, it was after Rosi spilled a bottle of nail polish all over them. I'm trying to see how many can be salvaged. Meanwhile, I'd gone to Walmart the other night and I saw just the buttons I was looking for to finish up my new baby's new sweater.

Since I got it all done, I figured I could share another scan. I don't know that this one is any better quality than the last, but I'm pretending it looks a little better, anyway.

I also finished up another crochet project yesterday, but I have to save that one for another day because I need to give it to the recipient first! Soon, however, you'll get a chance to see a new crocheted set of ... something ... and a pattern for the cutest little ... items.

Tuesday, August 25

My Very First Sweater

You may remember my asking for suggestions about what to make first for the baby. I decided on a sweater. I found a pattern that looked really interesting, where the sweater is actually crocheted in two pieces, both hexagons. Since I dislike finishing my work (that is, having to do more stuff after the crocheting is done), it seemed like a good idea. Only, I found it boring to work on. The entire sweater is made up of double crochets. I mostly completed a test version that is now clothing my daughter's teddy bear. I decided not to work one up for the baby.

On a whim the other day, I picked up The Big Book of Weekend Crochet at the library. Although most of the patterns didn't really appeal to me, I love the sweater shown on the front cover. Unfortunately (or, perhaps, providentially) the pattern didn't include a newborn size. So I made up my own. I altered the pattern stitch a bit to better fit the yarn I had available and I made my very own baby Fisherman's Sweater.

Sadly, with our camera still busted, I couldn't take a photograph of it. This poor-quality substitute will have to do (it's what happened when I put the sweater into my scanner). The orange bow is not meant to stay, but is keeping the shoulder flap together until I get around to sewing the buttons in place. That will be sometime after I find my button stash, or I break down and buy some more. While I wish I had a better photo to share with you, at least this does show off the stitch pattern pretty well. You'll have to use your imagination for the rest of it. You can click on the image to see a bigger version.

EDITED TO ADD: You can see the finished sweater with buttons here.

Of course, I didn't write down all the changes I was making to the pattern as I went along. Sorry about that. I can share the adapted stitch pattern I used, though.

Ch 18
Row 1 (wrong side): Sc in second ch from hook, dc in next ch, *slst in next ch, dc in next ch. Repeat from * 6 times. Sc in final ch. Ch 1 and turn.
Row 2 (right side): Sc in each st across. Ch 1 and turn.
Row 3: Sc in first sc, slst in next sc, *dc in next sc, slst in next sc. Repeat from * 6 times. Sc in final sc. Ch 1 and turn.
Row 4: Repeat Row 2.
Row 5: Sc in first sc, dc in next sc, *slst in next sc, dc in next sc. Repeat from * 6 times. Sc in final sc. Ch 1 and turn.

Repeat rows 2-5 until piece reaches the length you desire.

Now that I have finished the baby's sweater, my daughter has been begging for one of her own. I have a feeling hers will take a little longer than two days to complete. She's a bit bigger now than she was as a newborn.

Wednesday, June 24

What to Make First?

I've been following a number of other crafty ladies who are pregnant right now as well and they've all been showing off cute little sweaters and blankets and hats for their little ones. I haven't been doing much crocheting at all lately. Part of that is a side effect of the back trouble I've had. It's hard to crochet while you're flat on your back, I've discovered.

In any case, I'd really like to make something for our new bundle of joy before he actually shows his little face. My only question is: what should that be? A hat? Sweater? Chew toy (eh, maybe not).

If you could have one handmade crocheted item for your new bundle of joy, what would it be?

Saturday, April 11

Knitting with a Crochet Hook

File this under things I never knew were possible. Apparently there is a company called Amazing Yarns that makes crochet hooks with a small hole in the end through which you thread some string which allows you to crochet, knit, and tat all with the same tool.

After seeing some examples of the knitted projects, I had to try it out. Well, okay, I mocked up a homemade version because you know I couldn't wait for them to ship one from California. It really works. Stockinette, garter, knitting in the round--this is so cool! I have got to add these to my wish list.

I wonder if I could make cables. Hmmm ... must go play more.

Friday, April 10

FOs = Flying Objects?

There is a crafting term I have recently come across that took me several sightings to identify (puns entirely intended). For the record, FO stands for "finished object" and is generally seems to be used when showing off pictures of items one has completed. I have also seen UFO used for "unfinished object."

Today, I'm all excited about one of my long-time UFOs becoming an FO. I've been working for months on a lacy sweater for my daughter. Finally, a couple of days ago, I realized that I would never finish it and I frogged the thing. For those non-yarn-users, that means ripping out the stitches, because "rip it" sounds so much like "ribbit," or so I've been told. I started a new project that I'd made once before ... sort of.

Remember the doll I made a few months back for my 300th post contest? Well, the dress that doll was wearing, I patterned after an infant sleeper I'd found on Ravelry.

This week, I decided to make the pattern again, only as a shirt rather than a dress, and big enough to fit my daughter. I had to frog almost the entire project after I was just about finished with it because I'd miscalculated the shells (the bottom ruffly part) the first time. It was frustrating, but I think the end result is well worth the extra work. After tying in the ends, I had her try it on one last time for photos. She hasn't taken it off yet.

It matches so nicely with the gloves and the camo pants, don't you think?

Sunday, April 5

Simple Crocheted Hat Templates

One of my favorite things to crochet is hats. I find it so satisfying to begin and complete a project in a single sitting. A crocheting friend was asking recently for some easy hat patterns. I typed out my basic template for hats and realized that my crafty readers might like them as well.

With either style, you may use any yarn and make any size from preemie to adult, simply by changing the number of rows you increase.

Basic Cap or Cloche
  1. Start with a magic ring.
  2. Sc 6 into ring (do not join any rounds, but you may use a stitch marker if you desire).
  3. *Sc 2 into ea sc* around. (12)
  4. *Sc 2 in next sc, sc in next sc* around. (18)
  5. *Sc 2 in next sc, sc in next 2 sc* around.(24)
  6. *Sc 2 in next sc, sc in next 3 sc* around. (30)
  7. Continue increasing in this manner until hat is of appropriate diameter to fit wearer, then sc around even until hat is of appropriate length.
    1. Optional brim for cloche:
    2. *Sc 2 in next sc, sc in next 5 sc* around.
    3. *Sc 2 in next sc, sc in next 6 sc* around.
    4. Continue increasing in this manner until brim is of desired length.
    5. *Sc in ea sc* around.
  8. Tie off using futuregirl's invisible stitch technique, and weave in ends.

Basic Bucket Hat
  1. Start with a magic ring.
  2. Sc 8 into ring. Do not join any rounds.
  3. *Sc 2 into ea sc* around. (16)
  4. *Sc 2 in next sc, sc in next sc* around. (24)
  5. *Sc 2 in next sc, sc in next 2 sc* around.(32)
  6. *Sc 2 in next sc, sc in next 3 sc* around. (40)
  7. Continue increasing in this manner until hat is of appropriate diameter to fit wearer (if edges start to ruffle slightly, add a row of sc before next row of increases), then sc around even until hat is about ½"-¾" shorter than desired.
  8. *Sc 2 in next sc, sc in next 7 sc* around.
  9. *Sc 2 in next sc, sc in next 8 sc* around.
  10. Continue increasing in this manner until brim is of desired length.
  11. Tie off and weave in ends.

Friday, March 27

Hints of Pink Purse

Materials Used
Color A: Red Heart Super Saver Yarn in Royal (approx. 2.5 oz)
Color B: Caron Simply Soft Yarn in Rose (approx. 1.5 oz.)
I crochet hook (5.5 mm)
Stitch marker

Gauge
13 sc in A = 4”
13 sc rows in A = 4”

Finished Flat Size
6¾" high
7½" long
25" strap (measured end to end)

Special Stitches
honeycomb stitch (hc): slip hook into remaining loop of st in the previous same-color row and front loop only of the adjacent st in contrasting-color row, yo and pull loop through to front, yo and pull through both loops on the hook
backstitch single crochet (bsc): holding yarn to the front of work, slip hook into stitch from the back, yo and pull loop through to back, yo and pull through both loops on the hook
single crochet 2 together (sc2tog): *slip hook into next stitch, yo and pull loop through stitch onto hook* repeat once, yo and pull through all loops on hook
foundation single crochet (fsc): click on link for futuregirl’s fantastic tutorial.
back slip stitch (bsl): holding yarn to the front of work, slip hook into stitch from the back, yo and pull loop through to back and through loop on the hook

Foundation Rows
In A: ch 30, remove hook from loop and place stitch marker in loop to keep loop open. Turn work over.
In B: beginning with a loop of B on hook, sc in the bottom loop of each ch (the underside of the stitch). Remove hook from loop and place stitch marker in loop to keep loop open.

Body
Note: At the end of each round, remove hook from loop, keeping it open with a stitch marker.

Round 1: With A, ch 1, sc in back loop of ea chain in A across. Turn and sc in remaining loops of A across. (60 sts)
Round 2: With B, ch 1, sc through back loop of ea sc in B and front loop of adjacent sc in A around. (60 sts)
Round 3: With A, hc around.
Round 4: With B, hc around.
Rounds 5-36: Repeat rounds 3 & 4, tying off B at end of round 36.
Round 37: With A, sc through remaining loop of ea sc in A and BOTH LOOPS of adjacent sc in B around. Ch 1, but do not turn.

Flap and Strap
Note: Flap and strap are worked in A only. Do not turn work at end of row unless specified.

Row 1: Sc 28 across back of purse. Ch 1. (28 sts)
Row 2: Bsc 28 across. Ch 1.
Rows 3-8: Repeat rows 1 & 2.
Row 9: Sc in first sc, sc2tog twice, sc 18, sc2tog twice, sc in last sc. Ch 1. (24 sts)
Row 10: Bsc across. Ch 1.
Row 11: Sc in first sc, sc2tog twice, sc 14, sc2tog twice, sc in last sc. Ch 1. (20 sts)
Row 12: Repeat row 10.
Row 13: Sc in first sc, sc2tog twice, sc 10, sc2tog twice, sc in last sc. Ch 1. (16 sts)
Row 14: Repeat row 10.
Row 15: Sc in first sc, sc2tog, sc 10, sc2tog, sc in last sc. Ch 1. (14 sts)
Row 16: Repeat row 10.
Row 17: Sc in first sc, sc2tog, sc 8, sc2tog, sc in last sc. Ch 1. (12 sts)
Row 18: Repeat row 10.
Row 20: Sc 5, ch 2, skip next 2 sc, sc across.
Working down along edge of flap, place 1 sc in each row end to top of body.
Sc 2 along top of body, fsc 72 to form strap, attaching with 2 sc along top of body at opposite end.
With right side of flap facing you, work up along edge of flap, placing 1 sc in each row end to top.
Row 21: Bsl in ea of first 5 sc, ch 3, skip ch 2 space, Bsl in ea of last 5 sc. Turn.
Row 22: Slst in ea of first 5 bsl. In ch 3 loop, sc 2, ch 3, sc 2. Slst in ea of last 5 bsl.
Tie off and weave in ends.

Button
In B: Wrap yarn around finger to form two-stranded ring. In ring, make 3 sc along back edge. Leaving a loop of both strands, turn and work 3 sc along front edge. Tie off, leaving several inches on one end. Pull one strand from each side to shape button. Pull loops together and wrap with remaining length of yarn to stabilize shank. Weave in ends. Attach button in center front of body, up 6-8 rows from the bottom.

Drumroll, Please

Thanks to all of you entered my 400th post contest. The winner of my pink and blue handiwork is ...


Congratulations, Lillian!

For those of you who didn't win this time around, I have written up the pattern so you can make one for yourself. I'll post it later today.

Sunday, March 22

Socks

I have this theory that I can crochet socks. It's probably inspired by a book I got for my birthday, aptly named You Can Crochet Socks. Except, darned if I can't (no pun intended).

I've started at least three of the patterns, but either I'm reading them wrong or they weren't written very well in the first place because I have yet to turn out an actual wearable sock, much less a pair of them. Meanwhile, my feet have been cold all winter.

Maybe I should just suck it up and try knitting again. Knitting just seems so much less forgiving than crochet. If I make an error while I'm crocheting, I'll just rip out a row or two and fix my mistake. Knitting doesn't work that way, though. I have been reading about this technique where you knit two socks at once ... that could be useful.

Anybody else go from crochet to knitting? Any tips?

______________________________________________________________


Don't forget to enter my giveaway for this crocheted purse!
______________________________________________________________

Friday, March 20

Four Hundred


Welcome to my 400th blog post!

I apologize for the delay; I was unable to publish for a few days as my computer was recovering from a minor keyboard flood. I've managed to pull back into action an old keyboard I found packed away in a box. I am ecstatic to be able to type spaces again, but I'm finding it a bit tough to get used to the feel of this configuration. It's an old Dell keyboard from the late 1990s and every time I press a key, it clicks. Oddly unnerving.

To celebrate the bits of spring that are starting to appear outside, I designed this navy and pink crocheted purse. I call it "Hints of Pink." In honor of my 400th post, I have decided to give it away to one lucky reader. I am opening this contest to everyone, regardless of location, so those of you who live outside the US may enter as well. Click on any photos to view a larger image.

The purse is worked in the honeycomb stitch, so bits of the crocheted pink lining (right) show though the fabric on the outside. Note: Photos of the whole purse (left and above) were taken with the purse full.

The button is crocheted (far left) from the same pink yarn and can fit in any of three button holes (left). The purse measures approximately 7" high and 8" long, flat. The strap is about 25" from end to end, but will stretch out nearly as far as 36".

How to Enter

Tell me your favorite springtime memory or tradition. You can simply leave a comment on this post for a single entry, however, if you'd prefer to write a post on your own blog and link to this page, you can do that, too, and earn an extra entry for your trouble. Just leave me a second comment with a link to your post. The deadline for entries is this coming Thursday, March 26th at 10:00 PM, CDT.

Tuesday, March 10

Here with the Wind

Now that winter is almost gone, I'm finally getting some pictures of the thermal gear I made for my family this winter. Here is the set I made for Adam. It uses the honeycomb stitch (I've also heard it called the "thermal stitch") which produces a double-layered fabric for extra insulation. This also provides better protection against the wind than standard knit or crochet. Have I mentioned how strong the wind gets here? I'll have to tell that story in a minute. The embellishment is double crochet through the front and back posts with a second layer of single crochet on the inside to keep the thermal and wind-blocking properties. The back of the muff is a double layer of single crochet through the back loop only, stitched in a circle around the edge of the front panel.

As for my South Dakota wind story: One afternoon, shortly after we moved here, we were coming out of Panera after lunch. The wind was blowing so hard, I actually had to press into it to walk. Adam was walking a few paces in front of me and our daughter was between us. Each time she picked her foot up to take another step I worried that the wind would just pick her up and blow her away like the queue of potential nannies in the movie version of Mary Poppins. I called out to Adam (several times before he heard me) to please take her hand and hold tightly. He turned his head slightly to take her hand and the wind whipped his glasses from his face. Like the iconic scene of a man chasing his hat, reaching down to retrieve it only to have the wind send it a few feet farther on, he had to follow his glasses across the parking lot, daughter in tow, before he was able to reclaim them. He set them back on the bridge of his nose and quipped, "And they call Chicago the Windy City!"

Friday, February 13

Remember That Doll?

You may recall I had that contest and the winner wanted a crocheted doll for her daughter. I mentioned that I would keep everyone updated on the progress of said doll. My bad.

I finished her about a month ago. I think she turned out pretty cute.

The doll's body and dress are based on patterns I found on Ravelry (here and here, respectively). I used the same shell stitch for the slippers that is in the skirt, but otherwise didn't follow any particular pattern for those. The hood and mitts I made up as I went along (and forgot to keep notes again, sorry).

All it all it was a lot of fun. I'd made a few stuffed animals before, but never a doll. I really dislike tying ends in and sewing pieces together, so I've been thinking about how I might be able to cut down on the number of seams required by the pattern above. I especially liked making the doll's clothes and accessories. There is just something wonderful about small projects that can be completed in one sitting; it does wonders for my instant gratification cravings.

Wednesday, December 17

In Which I Announce the Contest Winner

Congratulations to Danielle from Two-third's Red! Danielle has chosen for her prize a small crocheted doll wearing a doggy hood and paws--a gift for her daughter. I'll post updates as I'm working on it so she, and all of you, can watch the project progress.

So far, the only progress I've made is to look at patterns. I am inspired by these patterns I found on Ravelry (you can see pictures if you click on the links):

Morgan - Unisex Amigurumi Baby Doll (PDF) by Rowena Holt
Peach Delight Baby Doll Dress by Christina Budd
Baby Girl Sleeper Set by Abigail Goss
LollyPup by Rachel Crowthers
Dog/Puppy Doll by Ally W. (I can't seem to get the pattern to load, so I'm linking to a photo from someone who made the doll)

Monday, December 15

I Won!

I won a giveaway! I can't say which one, since the prize just might be used as a Christmas gift for someone who reads this blog, but I can say it was from Michelle at Scribbit. Thanks, Michelle!!

*happy dance*

Now, you still have a chance to win, too. My 300th post/10,000 visitor custom crochet contest ends TODAY. Enter here. Good luck!

Friday, December 12

Recycled Giftwrap

This year, as I was thinking about what it takes to make a frugal, green Christmas, It occurred to me that I could combine recycling, crafting, and gifting!

If you're looking for money saving holiday tips, you can find a whole bunch over at Keeping the Kingdom First. There is a contest for the most creative frugal idea, with a $500 gift card to Wal-Mart as the prize. Head on over to the contest page and check it out!
click photos for larger images      

Materials
  • 25 plastic grocery bags made into plarn (plarnmaking instructions from My Recycled Bags.com), using only the solid color portion of the bag (if you want to use both the solid and printed sections of the bags, you'll only need about 15)
  • A few yards of contrasting scrap yarn or plarn for embellishment (optional)
  • 2 contrasting plastic bags for wrapping (I used bags from Barnes & Noble and Target for green and red)
  • Handles from approximately 10 bags and one bottom seam for bow
  • Size H (5.00 mm) crochet hook
Instructions

Box

Note: most rounds are worked continuously, do not join rounds with a slst unless indicated.

  1. Ch 2; 4 sc in 2nd ch from hook.
  2. 2 sc in ea sc around. (8 sts)
  3. 2 sc in ea sc around. (16 sts)
  4. 2 sc in 1st sc, *1 sc in next sc, 2 sc in next sc* repeat 6 times, 1 sc in last sc. (24 sts)
  5. 1 sc in 1st sc, *2 sc in next sc, 1 sc in ea next 2 sc* repeat 6 times, 2 sc in next sc, 1 sc in last sc. (32 sts)
  6. 2 sc in 1st sc, *1 sc in ea next 3 sc, 2 sc in next sc* repeat 6 times, 1 sc in ea last 3 sc, join with slst. (40 sts)
  7. Ch 1, sc in ea sc around, join with slst.
  8. Turn to ws; slst in ea sc around.
  9. Turn to rs; sc in ea slst around.
  10. Sc in ea sc around. Repeat for next 6 rows, join with slst at end of last row.
  11. Ch 1, sc in ea sc around, join with slst.
  12. Tie off and weave in ends.
  13. Embellish as desired.
Lid

Note: most rounds are worked continuously, do not join rounds with a slst unless indicated.
  1. Ch 2; 4 sc in 2nd ch from hook.
  2. 2 sc in ea sc around. (8 sts)
  3. 2 sc in ea sc around. (16 sts)
  4. 2 sc in 1st sc, *1 sc in next sc, 2 sc in next sc* repeat 6 times, 1 sc in last sc. (24 sts)
  5. 1 sc in 1st sc, *2 sc in next sc, 1 sc in ea next 2 sc* repeat 6 times, 2 sc in next sc, 1 sc in last sc. (32 sts)
  6. 2 sc in 1st sc, *1 sc in ea next 3 sc, 2 sc in next sc* repeat 6 times, 1 sc in ea last 3 sc. (40 sts)
  7. Sc in ea sc around, join with slst.
  8. Ch 1, sc in first 10 sc, *2 sc in next sc, sc in next 9 sc* repeat 2 times, join with slst. (43 sts)
  9. Turn to ws; slst in ea sc around.
  10. Turn to rs; sc in ea slst around.
  11. Sc in ea sc around.
  12. Sc in ea sc around, join with slst at end of last row.
  13. Ch 1, sc in ea sc around, join with slst.
  14. Tie off and weave in ends.
  15. Embellish as desired.
Wrapping

Cut handles, ends, and writing off contrasting colored bags. Use one to line box and protect gift. Wrap another around the outside of the box and secure with tape, as you would wrapping paper.


Bow
  1. Flatten creases out of the handles of about 10 bags; the more handles you use, the fuller your bow will be.
  2. Stack handles together, folded at seams (the very top of the bag).
  3. Squeeze centers together and tie tightly with the bottom seam of one bag; do not trim ends of tie.
  4. Trim off top seams and bottom edges of handles to within 2" of center tie.
  5. Make ½"- to 1"-deep cuts across trimmed edges to fringe.
  6. Spread out layers into a pleasing pouf.
  7. Attach to wrapped gift using ends of tie.

Friday, December 5

You Make Me Laugh

Hooray, it's my 300th post! And I finally decided what to give away. Woo-hoo!

What you can win

A custom crocheted item, such as a hat, shawl, bag, or stuffed toy.

Take a look at my sidebar to see a few examples of my work, or click on the thumbnails below for larger images.


How to enter

I've been having a tough week. Adam told me it's been showing a bit in my most recent posts, so maybe you already knew that. I could use some fun. Your mission is to entertain me. Tell me a joke or a funny story in the comments. Link to a video of you making a fool of yourself. Share with me what has made you laugh out loud.

You can earn an extra entry by publicizing my contest on your blog. Feel free to use my blog button or the rotating image banner in my sidebar (let me know if you need the script for the banner).

As a special bonus, if you actually make me laugh out loud, you will earn a second (or third) entry.

I will be accepting entries through December 15th, so be sure to spread the word. And please, keep it clean. Confine all toilet humor to incidents involving training. (Thanks!)

This contest is open to everyone, but my international readers should be forewarned that if you win, your crocheted piece will be mailed slow-boat-to-China class, so it may take a while to arrive.

I make you laugh

I'll get us started on the laughter. I've shared this story before, so it may be familiar to longtime readers.

I was visiting Cornwall a few years back, and I watched the local news one evening. They had a story about a nearby football (soccer) team that had gotten into trouble because their ball boy was wearing shorts on a cold game day. Some official body was giving the team management grief about it. I probably missed some of the details, since I don't understand UK organized (or should I say "organised") football, but I was under the impression that the big concern was the ball boy's age and making sure he wasn't working under unduly harsh conditions.

At any rate, the news show had an interview with the team's manager and he pointed out that the boy had been wearing plenty of other warm clothing (mittens and wool socks and a jacket and so forth) and he never even complained of the cold. The interviewer asked some question about the upcoming game and what plans had been made to be sure the ball boys kept toasty.

The team manager kept a completely straight face and said, "Well, if the boys get cold, we can just wrap their legs in red tape."